How to Set up Email Forwarding in cPanel?
How to Set up Email Forwarding in cPanel?
In today’s digital age, efficiently managing your emails is crucial, whether for personal use, business communication, or customer service.
Imagine never missing an important email again, seamlessly redirecting your messages to your preferred inbox, or managing multiple email accounts effortlessly. This is where email forwarding comes into play—a powerful feature that can save you time, enhance your productivity, and ensure you stay connected.
Setting up email forwarding in cPanel is practical and remarkably straightforward. Whether you are a seasoned webmaster or a novice just getting started, this guide will walk you through configuring email forwarding in cPanel step-by-step.
By the end of this article, you will have the skills to easily direct emails from one address to another, keeping your communication streamlined and efficient
Also Read: How to Create a Basic SPF Record in cPanel?
What is Email Forwarding?
Email forwarding is a feature that allows you to redirect emails sent from one email address to another automatically. This means that when an email is sent to your primary email address, it can be automatically forwarded to another address of your choice.
For example, if you have multiple email addresses for different purposes (such as [email protected], [email protected], and [email protected]), you can set up forwarding rules to direct all emails sent to these addresses to your main email account. This way, you can manage all your correspondence from a single inbox without logging into multiple accounts.
Also Read: How to Change the Time Zone in cPanel Roundcube Webmail?
Steps to Setup Email Forwarding in cPanel
➔ Login to cPanel by using your username & password.
➔ Once you log in, scroll down to the ‘Email’ section.
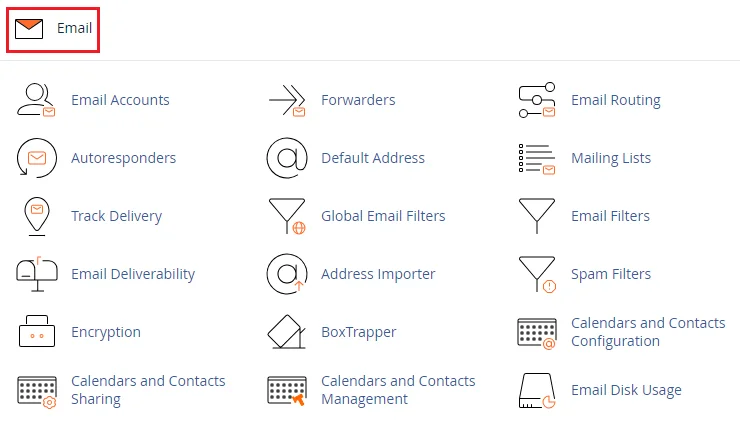
➔ To do that, click the ‘Forwarders’ icon, which will take you to the email forwarder management interface.
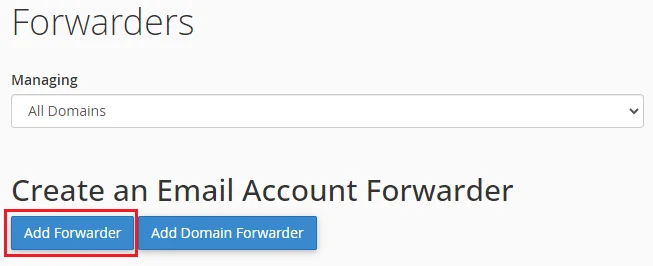
➔ On the Forwarders page, you have to click on the ‘Add Forwarder’ button.
➔ In that, you will be prompted to enter the details for the new forwarder:
- Address to Forward: You need to enter the email address from which you want to forward emails. For example, if your domain is example.com and you want to forward emails from [email protected], you would enter info.
- Domain: If you have multiple domains associated with your cPanel account, select the appropriate domain from the drop-down menu.
- Destination: Enter the email address to which you want to forward emails. This can be any valid email address, whether it’s on the same domain, a different domain, or even an external email provider like Gmail or Yahoo.
Also Read: A Simple Guide To Connect Your cPanel Email to Gmail
➔ After entering the required details, you need to click the ‘Add Forwarder’ button.
➔ After that, you will see a confirmation message indicating that the forwarder was successfully created.

That’s it! Your email forwarding has been successfully done. To ensure that the forwarder is working correctly, send a test email to the original email address &
check the destination email address to see if the test email arrived.
➔ In that field, enter the new password.
(For a stronger password, you can use the ‘Generate’ button to create a secure password automatically.)

➔ After entering the new password, scroll down and click the ‘Update Email Settings’ button to apply the changes.
➔ After successfully updating the password, cPanel will display a confirmation message indicating that the changes have been saved.

Also Read: How to Create a basic SPF Record in cPanel?
That’s it! By following these steps, you can easily reset the password for any email account managed through cPanel.
Related Posts:
- How to Enable or Disable PHP Error Logging in cPanel?
- How to Create a basic SPF Record in cPanel?
- How To Decrease Inode Usage In cPanel?
- How to Reset Email Account Password in cPanel?
- How to Create a Table in phpMyAdmin?
- How to Change MySQL Database User Password From cPanel?
- How to Configure Domain Redirects in cPanel?
- How to Change Table Name in phpMyAdmin?
- How to Set up Email Forwarding in cPanel?
- How to Change the Time Zone in cPanel Roundcube Webmail?

Latest Posts
- Server-Side Scripting: PHP, Node.js, Python – A Detailed Comparison
- Securing Your Website in 2024: Essential Strategies for Online Safety
- The Future of Web Development Technologies: Trends to Watch in 2024
- How Banks Handle Server-Side Operations and Ensure System Security: An Inside Look
- Tips for Writing Clean, Understandable, and Efficient Code: Avoiding Garbage Code
- Tailwind CSS: Revolutionizing Modern Web Design
- Basic Linux Commands for Beginners: A Starter Guide
- Dairy Farming Loan Apply
- BSNL Recharge Plan
- Bijli Bill Mafi Yojana Online Apply
Technical
- DevOps Roadmap
- How To Install and Configure an SNMP on Ubuntu 20.04
- Apple releases iOS 18 Developer Beta 2 with iPhone screen mirroring, RCS toggle,and more
- How to enable SNMP on Ubuntu Linux 18.04 and above
- How to Force HTTPS Using .htaccess (Updated 2024)
- Display All PHP Errors: Basic & Advanced Usage
- PHP alert
- MongoDB loads but breaks, returning status=14
- MongoDB database deleted automatically
- MongoDB all Error Solutions
Category